Access
Mobile Fulfillment
Access
Mobile Fulfillment
There are three ways to access Mobile Fulfillment using your mobile device or tablet:
Quick Access Menu
Menu List
Menu Bar
Quick Access Menu
MarketDirect StoreFront recommends using the Quick Access Menu option because of it's effectiveness on a mobile device or tablet.
1 Login to your MarketDirect StoreFront account and access the Administration Home page.
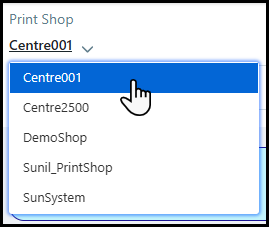
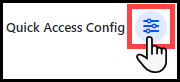
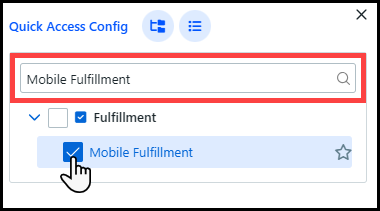
2 Tap the Quick Access Config icon.
3 Enter Mobile Fulfillment into the Search bar.
4 Select the Mobile Fulfillment check-box to add the page to the Quick Access Menu.
5 Tap the Mobile Fulfillment tile.
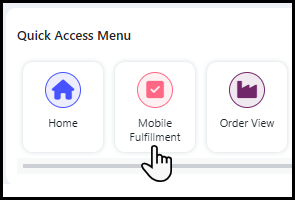
The next time you login to MarketDirect StoreFront, all you will need to do is click the Mobile Fulfillment tile.
Menu List
1 Login to your MarketDirect StoreFront account and access the Administration Home page.
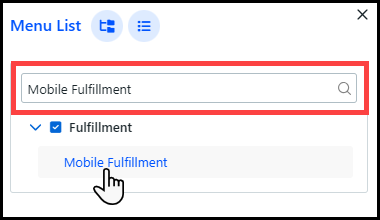
2 Tap the Menu List icon.
![]()
3 Enter Mobile Fulfillment into the Search bar.
4 Tap Mobile Fulfillment.
Menu Bar
1 Login to your MarketDirect StoreFront account and access the Administration Home page.
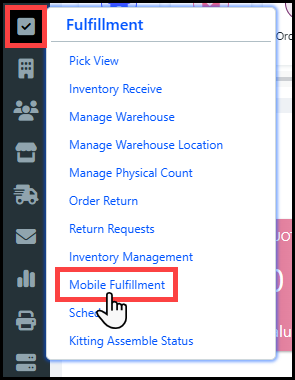
2 Tap the Fulfillment icon in the Menu Bar.
3 Tap Mobile Fulfillment.
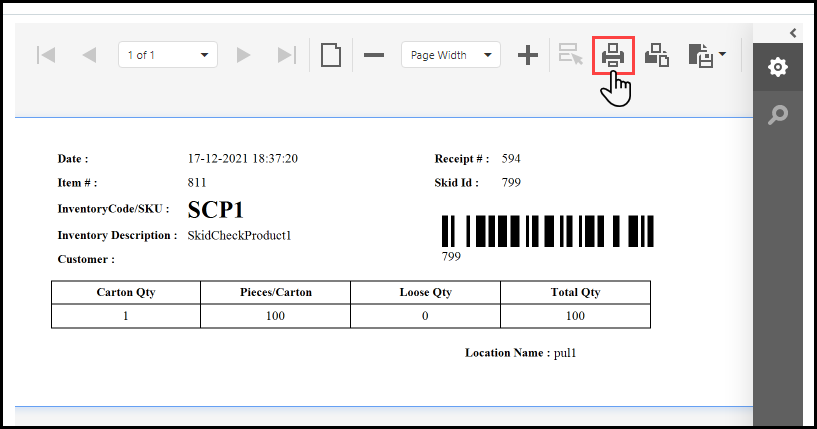
Receive
items into inventory using Mobile Fulfillment
Accounting for goods received into inventory is critical because all inventory operations hinge on whether the number of stock on hand is accurate. Mobile Fulfillment lets you efficiently enter inventory into the system for accurate pick operations and inventory management.
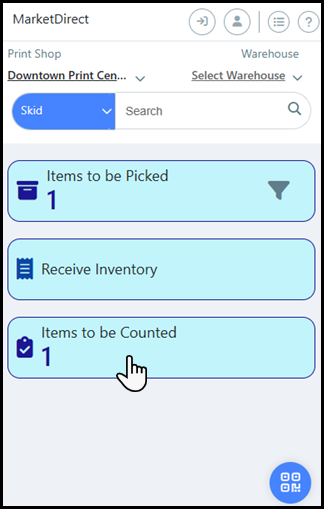
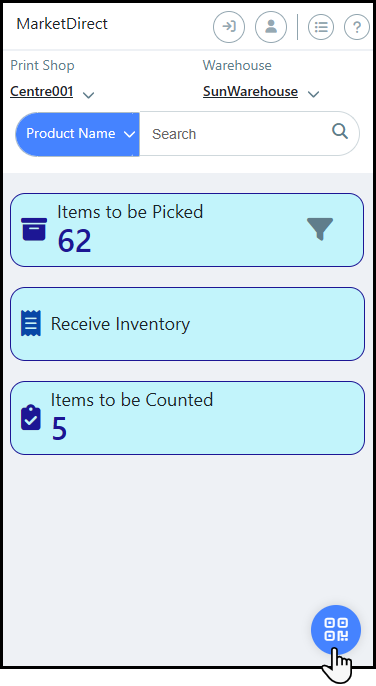
1 Go to Administration > Mobile Fulfillment.
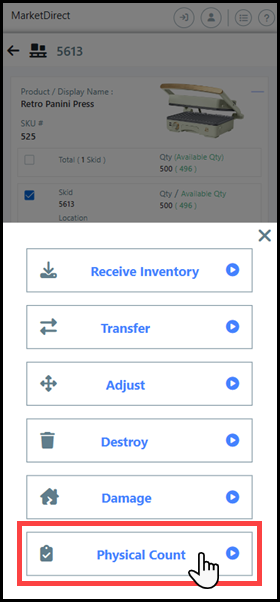
2 There are three ways to open the Receive Inventory page in Mobile Fulfillment:
● Scan Barcode:
● Tap the Scan Barcode icon.
● Scan the barcode using your phone's camera.
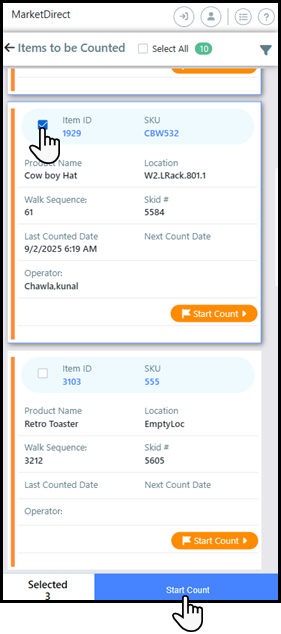
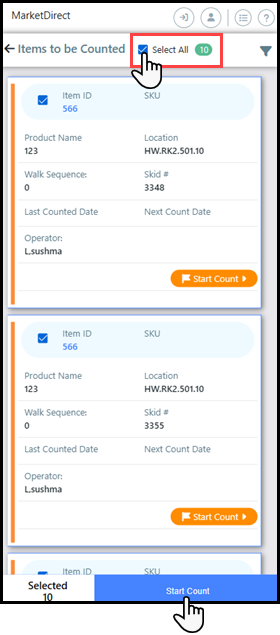
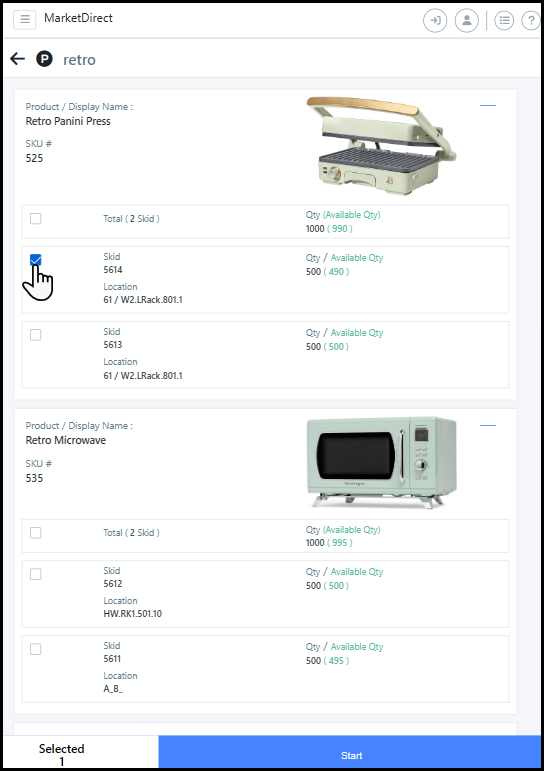
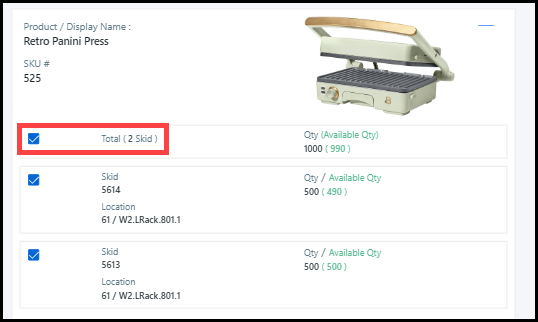
● Select the item(s) from the list you want to receive into inventory by tapping the check-box next to the item.
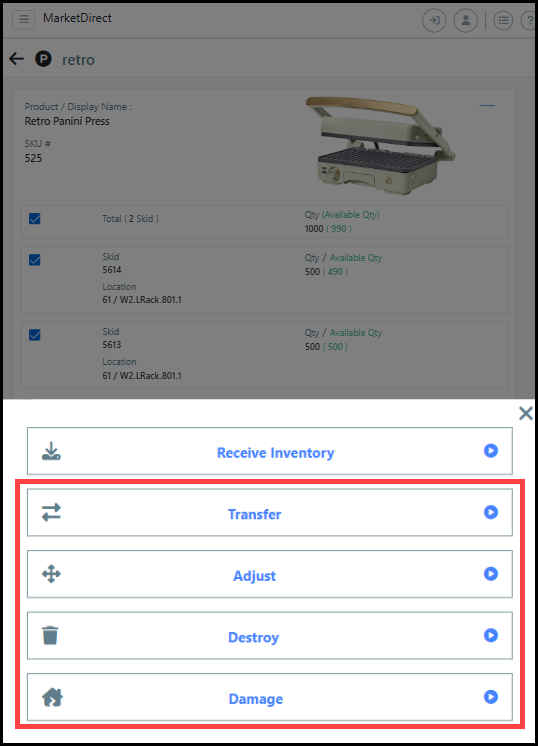
● Tap Start and select Receive Inventory.
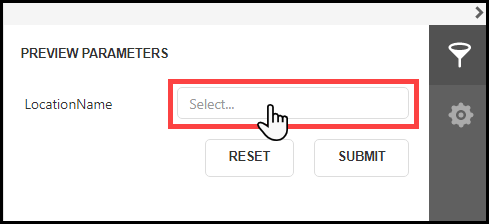
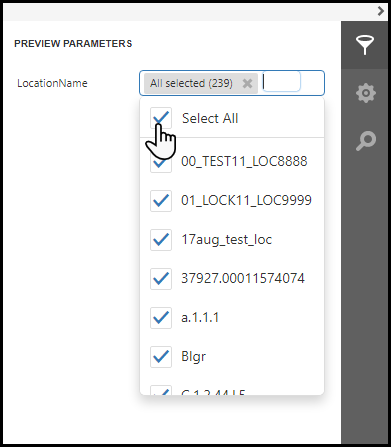
● Global Search:
● Tap the Search Filter drop-down list.
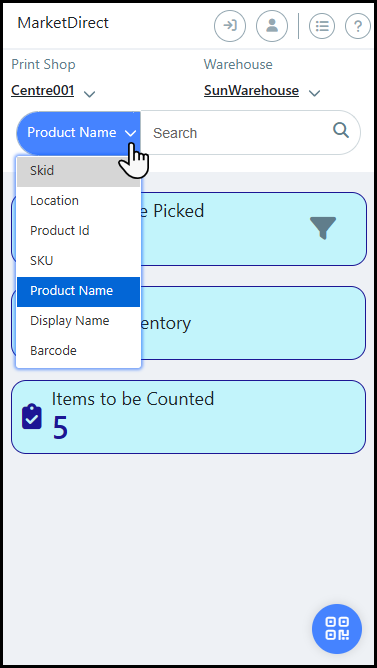
● Choose the filter for your Mobile Fulfillment search.
For example, if you want to search for a product based on skid number, select Skid from the Search Filter drop-down list. Filters include Skid, Location, Product ID, SKU, Product Name, Display Name, and Barcode. If you search for an item using the Barcode filter, then you must enter the alpha-numeric value of the barcode into the field.
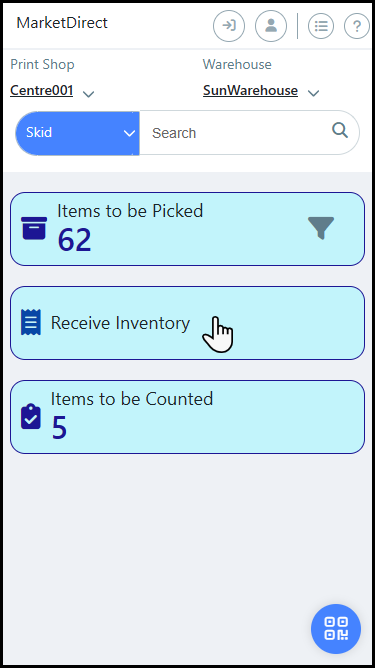
● Enter your search into the Global Search field.
● Select the item(s) from the list you want to receive into inventory by tapping the check-box next to the item.
● Tap Start and select Receive Inventory.
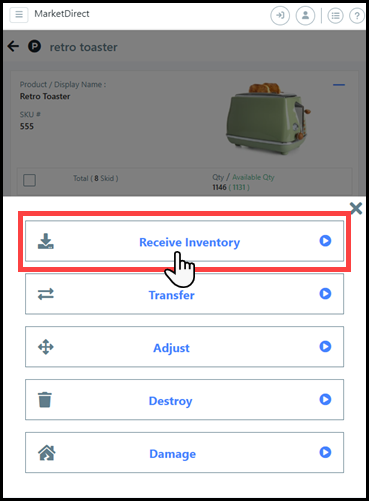
● Receive Inventory:
● Tap the Receive Inventory option on the Mobile Fulfillment home page.
● Either use the Global Search or Scan Barcode option to locate the item you want to receive into inventory.
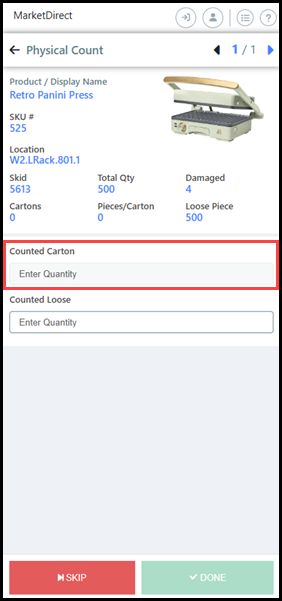
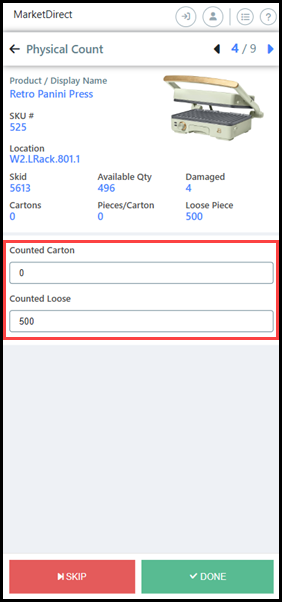
3 Complete the fields in the Product Information section and click Add:
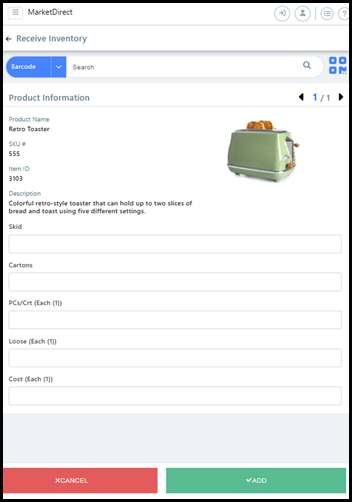
● Skid: Specify the number of skids you are receiving.
● Cartons: Specify the number of cartons per skid.
● PCs/Crt: Specify the number of pieces or boxes per carton.
● Loose: Specify the number of loose items.
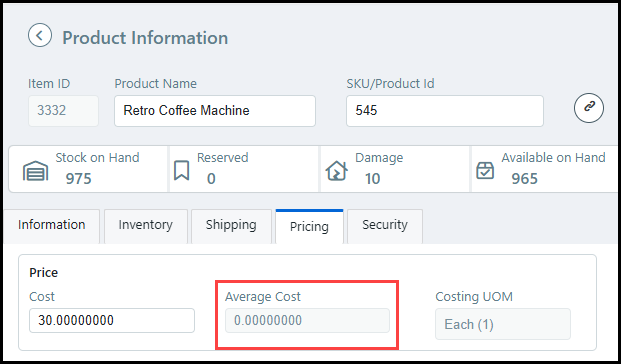
● Cost ( ): Specify the cost per unit of measurement (e.g., per item, or Each), which will be used to calculate the Average Cost on the product Pricing tab. This is especially useful for cost-plus product pricing.
The Average
Cost field on the product Pricing
tab.
4 Complete the necessary fields on the Receive Inventory Details page and click Next:

● Received By: (Auto-populated) By default the inventory will be received by the administrator who is currently logged into the system.
● Received From: Specify from whom you are receiving the product, such as a third-party vendor or customer company.
● Company: From the drop-down list, select the customer associated with the product.
● External reference#: Enter a purchase order number generated from an MIS or external accounting application. This field can be used for any other cross-reference number you want to use for tracking the received inventory.
● Receipt Notes: Record any key information such as "2 cartons damaged; will need recount."
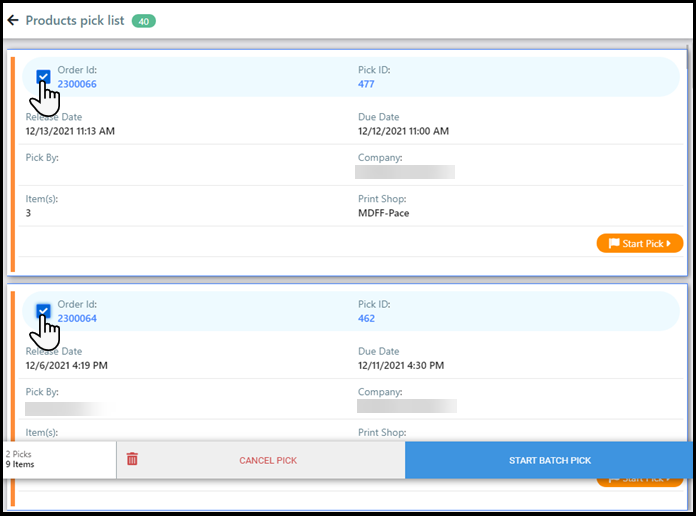
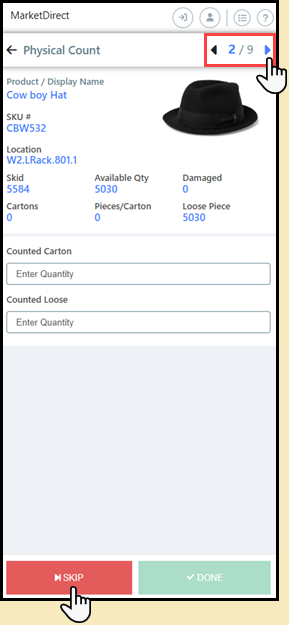
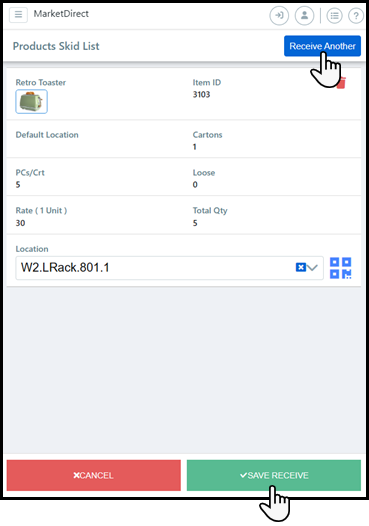
5 Either tap Save Receive to enter the items into inventory or tap Receive Another to start the process from the Receive Inventory page.
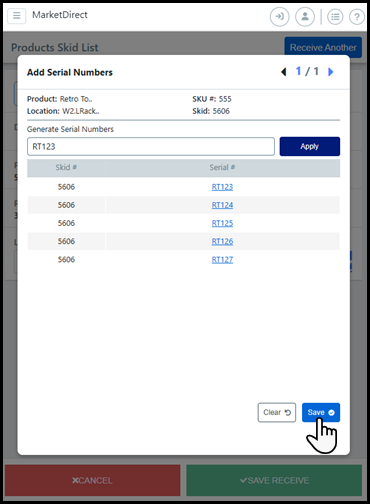
If you received an item with serial numbers,
then the Add Serial Numbers window will open. Either manually
enter each serial number in the Serial
# column, or
auto-generate a string of serial numbers by entering the first
number into the Generate Serial
Numbers field and then
click Apply. Serial numbers can be alpha-numeric,
but auto generated serial numbers must end with an actual number.
After a serial number is entered for each item received, click
Save.
For more information on serial numbers, see Inventory
Serialization.
If you received an item enabled for Lots,
then the Lot Tracking window will open. Complete the fields and
click Save.
![]()
For more information on lots, see Lot
Management.


.png)